
Every tractor owner knows how crucial it is to keep their equipment running smoothly, yet even the most reliable machines can throw you a curveball. Most people panic at the first sign of an odd noise, but studies show that catching even one small mechanical issue early can reduce costly repairs by up to 70 percent. The real difference comes from knowing the right steps to assess, prepare, and restore your tractor long before any major breakdown ever threatens your harvest.
Table of Contents
- Step 1: Assess Your Tractor’s Condition
- Step 2: Gather Necessary Tools and Parts
- Step 3: Perform Routine Maintenance Checks
- Step 4: Address Common Mechanical Issues
- Step 5: Test Equipment Functions After Repair
Quick Summary
| Key Point | Explanation |
|---|---|
| 1. Thoroughly inspect tractor condition | Perform visual and operational checks to identify wear, damage, and mechanical issues before they escalate. |
| 2. Compile an essential tool list | Gather high-quality, specific tools for agricultural machinery to ensure efficient repair without interruptions. |
| 3. Conduct routine maintenance checks | Regularly assess fluids, mechanical components, and tire conditions to prevent breakdowns and extend equipment lifespan. |
| 4. Document all findings and actions | Keep detailed records of inspections, repairs, and parts replacements to track maintenance history and inform future work. |
| 5. Test equipment thoroughly after repairs | After making repairs, conduct extensive performance tests under various conditions to confirm proper functioning and safety. |
Step 1: Assess Your Tractor’s Condition
Assessing your tractor’s condition is the critical first stage in any effective repair strategy. This comprehensive evaluation helps you diagnose potential issues, prevent future mechanical failures, and determine the most appropriate repair methods for your agricultural machinery.
Initial Visual and Operational Inspection
Begin your assessment with a thorough visual examination of the entire tractor. Walk around the machine and look for obvious signs of wear, damage, or corrosion. Check tire conditions, looking for uneven wear patterns, sidewall cracks, or significant tread degradation. Examine hydraulic lines for potential leaks, paying close attention to connections and hose conditions.
Start the tractor and listen carefully to its operational sounds. Unusual noises often indicate underlying mechanical problems. A knocking sound could suggest issues with engine bearings, while grinding sounds might point to transmission or differential complications. Note any vibrations, unexpected sounds, or performance irregularities during this initial operational test.
Systematic Component Evaluation
After the initial visual and auditory inspection, conduct a systematic evaluation of key tractor components. Check fluid levels meticulously: engine oil, hydraulic fluid, coolant, and transmission fluid. Low or contaminated fluids can signal potential mechanical stress or imminent component failure. Use a clean, white cloth or dipstick to assess fluid quality, looking for discoloration, particulate matter, or unusual consistency.
Inspect electrical systems by testing battery voltage and examining wire connections for corrosion or damage. Check battery terminals for buildup and ensure all connections are tight and clean. Look for frayed wires, loose connections, or signs of electrical wear that could compromise your tractor’s performance.
Document your findings systematically. Create a detailed checklist that captures observed issues, potential repair needs, and areas requiring immediate attention. This documentation serves as a crucial reference for developing a comprehensive repair strategy and tracking your tractor’s maintenance history.
Remember, a meticulous initial assessment can save significant time and money by identifying potential problems before they escalate into major mechanical failures. Patience and attention to detail are your most valuable tools during this critical first step of tractor repair.
Step 2: Gather Necessary Tools and Parts
Successful tractor repair demands meticulous preparation and having the right tools and replacement parts readily available. This step transforms your assessment insights into a strategic repair plan, ensuring you are fully equipped before beginning any mechanical work.
Essential Tool Collection
Based on your initial tractor condition assessment, compile a comprehensive tool collection. Professional mechanics recommend investing in high-quality tools specific to agricultural machinery. Your core toolkit should include precision wrenches, socket sets with metric and standard measurements, torque wrenches, pliers with various configurations, screwdrivers, jack stands, and hydraulic floor jacks rated for heavy equipment.
Electrical diagnostic tools are equally critical. Acquire a multimeter for checking electrical systems, wire strippers, electrical tape, and connection testing equipment. Consider specialized tractor repair tools like seal pullers, bearing extractors, and hydraulic line disconnection tools. These precision instruments can make complex repairs significantly more manageable and reduce the risk of additional damage during maintenance.
Parts and Replacement Strategy
After identifying specific repair needs during your initial assessment, source replacement parts strategically. Contact authorized agricultural machinery parts suppliers or explore reputable online marketplaces specializing in tractor components. Prioritize original equipment manufacturer (OEM) parts for critical systems to ensure optimal compatibility and performance.
Create a detailed inventory of required parts, cross-referencing your tractor’s make, model, and specific component specifications. This prevents costly purchasing mistakes and reduces potential delays. Consider purchasing slightly more hardware than immediately necessary to account for unexpected complications or additional wear discovered during the repair process.
Verify part compatibility by checking serial numbers, consulting technical manuals, and potentially contacting manufacturer support. Some complex replacements might require specialized knowledge or professional consultation. Do not hesitate to seek expert advice if you encounter uncertainty during parts selection.
Organize your gathered tools and parts systematically in a clean, dry workspace. Use toolboxes with compartmentalized storage, label containers clearly, and create a staged workspace that allows efficient movement and access during repair procedures. Proper organization minimizes confusion and reduces the likelihood of misplacing critical components during complex repair work.
Below is a summary table of essential tractor repair tools, their specifications, and purposes to help you prepare your workspace efficiently.
| Tool/Equipment | Specifications/Type | Purpose |
|---|---|---|
| Precision Wrenches | Metric and standard sizes | Tightening/loosening nuts and bolts |
| Socket Set | Metric and standard measurements | Fastening/removing various components |
| Torque Wrench | Calibrated for heavy equipment values | Ensuring precise bolt and nut tension |
| Pliers | Various configurations (needle, slip-joint) | Gripping, bending, and cutting wires |
| Screwdrivers | Multiple head types and sizes | Fastening/loosening screws |
| Hydraulic Floor Jack | Heavy equipment rating | Safe lifting of tractor for access |
| Multimeter | Digital, automotive compatible | Electrical system testing |
| Seal Puller/Bearing Extractor | Tractor-specific models | Removing seals and bearings efficiently |
| Jack Stands | Weight rated for tractors | Securing tractor during repairs |
Remember, thorough preparation is the foundation of successful tractor maintenance. Taking time to gather the right tools and parts will save you significant time, frustration, and potential additional repair costs down the line.
Step 3: Perform Routine Maintenance Checks
Routine maintenance checks are the cornerstone of preventing significant mechanical failures and ensuring your tractor operates at peak performance. This critical step involves systematically examining key systems and components to identify potential issues before they escalate into costly repairs.
Comprehensive Fluid System Evaluation
Begin with a meticulous fluid system inspection. Clean fluids are the lifeblood of your tractor’s mechanical systems. Start by draining and examining engine oil, looking for signs of contamination, metal particulates, or unusual discoloration. Use a clean white cloth or specialized oil analysis kit to assess fluid quality. Dark, gritty oil indicates internal engine wear and potential lubrication problems.
Check hydraulic fluid levels and condition with equal scrutiny.
Hydraulic systems are particularly sensitive to contamination. Look for signs of water intrusion, which appears as a milky discoloration. Inspect transmission and differential fluids, ensuring they maintain proper levels and demonstrate clear, consistent coloration. Replace filters simultaneously with fluid changes to maintain optimal system cleanliness.
Critical Component Inspection and Adjustment
Move beyond fluid systems to perform comprehensive mechanical checks. Examine belt tensions carefully, looking for signs of wear, cracking, or improper alignment. Use a belt tension gauge to ensure precise adjustment, as loose or overly tight belts can cause significant mechanical stress. Inspect cooling system components, including radiator fins, hoses, and water pump, checking for leaks, corrosion, or potential blockages.
Tire maintenance requires careful attention. Check tire pressure using a calibrated gauge, ensuring uniform inflation across all wheels. Uneven tire pressure can cause unbalanced traction, increased fuel consumption, and accelerated tire wear. Rotate tires if necessary and inspect sidewalls and treads for damage, punctures, or unusual wear patterns that might indicate alignment or suspension issues.
Grease all lubrication points meticulously. Use high-quality agricultural equipment grease and apply it systematically to bearings, joints, and moving components. Proper lubrication reduces friction, prevents premature wear, and extends the overall life of critical mechanical systems.
Document your findings comprehensively. Create a detailed maintenance log that records fluid conditions, component states, and any adjustments made.
![]() This documentation serves as a valuable reference for future maintenance and helps track your tractor’s long-term mechanical health.
This documentation serves as a valuable reference for future maintenance and helps track your tractor’s long-term mechanical health.
Remember that routine maintenance is an investment in your agricultural equipment’s longevity and performance. Spending time on these detailed checks can prevent expensive repairs and unexpected breakdowns during critical farming periods. Approach each maintenance session with patience, attention to detail, and a systematic mindset.
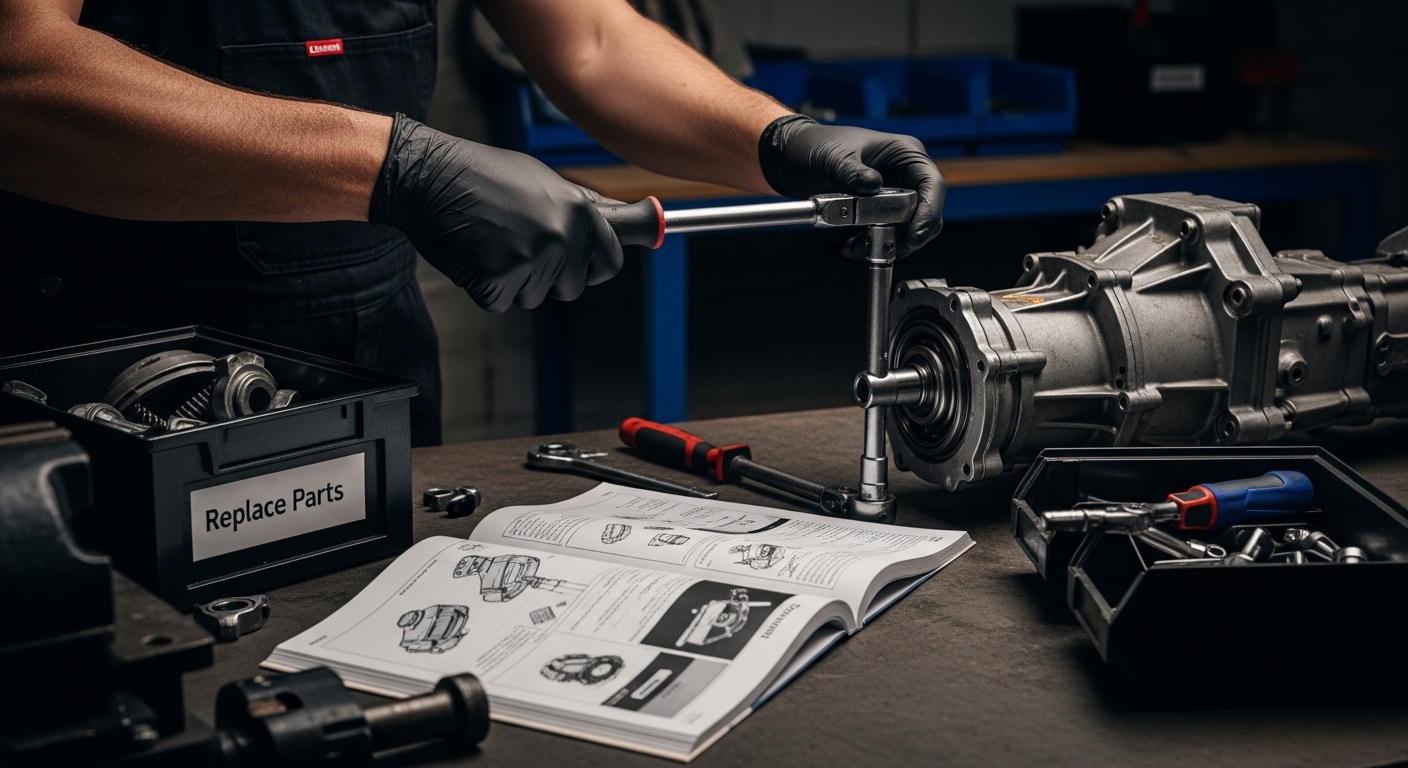
Step 4: Address Common Mechanical Issues
Addressing common mechanical issues requires a systematic approach that combines diagnostic skills, technical knowledge, and strategic problem-solving. This critical step transforms your initial assessment and maintenance checks into targeted repair actions that restore your tractor’s optimal performance.
Diagnostic and Repair Strategy
Engine performance problems demand careful, methodical investigation. Start by analyzing symptoms such as rough idling, power loss, or unusual noises. Compression tests provide crucial insights into engine health, helping you determine whether issues stem from valve problems, piston ring wear, or more complex internal mechanical failures. Use a compression gauge to measure each cylinder, comparing readings against manufacturer specifications.
Electrical system troubleshooting requires precision. When encountering starting difficulties or intermittent electrical failures, begin with battery and alternator testing. Check battery voltage using a multimeter, ensuring it maintains proper charge levels. Inspect electrical connections for corrosion, ensuring tight, clean contacts. Loose or corroded connections can cause significant electrical system disruptions, mimicking more complex mechanical problems.
Strategic Component Replacement and Adjustment
Hydraulic system issues often manifest through reduced lifting power, fluid leaks, or erratic movement. Carefully inspect hydraulic lines for signs of wear, cracking, or potential fluid seepage. Replace damaged hoses immediately, using proper torque specifications when reconnecting fittings. Bleeding air from hydraulic lines is crucial to restoring full system performance, requiring patience and systematic approach.
Transmission and drivetrain complications demand careful diagnosis. Grinding gears, unexpected slipping, or difficulty changing speeds indicate potential internal mechanical stress. Assess transmission fluid condition, looking for signs of contamination or breakdown. Some issues can be resolved through fluid replacement and filter changes, while more severe problems might require component rebuilding or complete replacement.
Cooling system maintenance prevents overheating and potential engine damage. Inspect radiator fins, checking for debris accumulation or damage. Clean radiator surfaces carefully, ensuring unobstructed airflow. Replace coolant at recommended intervals, using manufacturer-specified mixtures to maintain optimal thermal performance.
Document each repair action meticulously. Record diagnostic steps, parts replaced, and specific adjustments made. This documentation serves as a valuable reference for future maintenance and helps track your tractor’s mechanical history. Approach each repair with patience, understanding that complex mechanical systems often require multiple diagnostic attempts to resolve completely.
This troubleshooting table organizes common tractor issues from the article, with likely causes and recommended repair strategies based on systematic diagnosis.
| Problem | Likely Cause | Recommended Action |
|---|---|---|
| Unusual Engine Noise | Engine bearing wear or internal issue | Perform compression test, inspect bearings |
| Power Loss/Rough Idling | Valve or piston ring problem | Run compression test, replace worn parts |
| Electrical Starting Problems | Bad battery, corroded connections | Test battery/alternator, clean terminals |
| Hydraulic Power Loss/Leaking | Worn hoses, air in the system | Replace hoses, bleed hydraulic lines |
| Gear Grinding/Transmission Slip | Low/dirty fluid, worn parts | Check/replace transmission fluid and filter |
| Overheating | Clogged radiator, old coolant | Clean radiator, replace coolant as needed |
Remember that successful tractor repair combines technical skill, systematic thinking, and careful observation. Each mechanical issue presents an opportunity to improve your understanding of your agricultural equipment’s intricate systems.
Step 5: Test Equipment Functions After Repair
Testing equipment functions represents the critical final stage of tractor repair, where theoretical fixes transform into practical verification. This comprehensive evaluation ensures that your repair work has successfully restored the tractor’s full operational capabilities and identifies any remaining performance issues.
Systematic Performance Verification
Begin with a controlled startup procedure that allows you to observe the tractor’s initial performance characteristics. Start the engine and monitor its behavior carefully during the first few minutes. Listen for unusual sounds, check for smooth acceleration, and observe temperature and pressure gauges. Pay special attention to any residual vibrations, irregular idling, or unexpected warning indicators that might suggest incomplete repairs.
Conduct a comprehensive hydraulic system test by engaging various operational functions. Activate lift mechanisms, test attachment controls, and verify the precision of hydraulic movements. Raise and lower implements multiple times, checking for smooth, consistent motion without jerking or resistance. Hydraulic system performance directly impacts your tractor’s versatility and working efficiency.
Comprehensive Operational Assessment
Move beyond stationary testing to evaluate the tractor’s dynamic performance. Drive the equipment across different terrain surfaces, assessing transmission responsiveness, steering alignment, and overall mechanical stability. Simulate actual working conditions by testing various gear ranges and load-bearing scenarios. This practical testing reveals potential issues that might not be apparent during static inspections.
Electrical system verification requires methodical checking of all integrated components. Test lighting systems, dashboard indicators, and auxiliary power outlets. Verify battery charging performance and alternator functionality by monitoring electrical load and system responsiveness. Use diagnostic tools to scan for any remaining error codes that might indicate unresolved mechanical complications.
Create a detailed test log documenting each performance assessment. Record specific observations, including time of testing, environmental conditions, and any notable performance characteristics. This documentation serves as a valuable reference for future maintenance and helps track the long-term effectiveness of your repair work.
Pay careful attention to temperature and pressure readings throughout the testing process. Sudden changes or unexpected fluctuations can indicate underlying issues that might require further investigation. Allow sufficient time for comprehensive testing, understanding that some mechanical problems only become apparent after extended operational periods.
Remember that thorough testing is not just about confirming repairs but about ensuring the reliability and safety of your agricultural equipment. Approach this final stage with patience, attention to detail, and a commitment to achieving optimal tractor performance. Your systematic verification process transforms technical repairs into dependable machinery ready for demanding agricultural work.
Restore Your Tractor’s Performance With the Right Parts and Expert Support
You already know that tractor repair is much more effective with proper preparation, accurate diagnosis, and using the best replacement parts. When your assessment reveals worn components or unexpected breakdowns, the stress of finding exactly the right spare part can slow your maintenance work and put your productivity at risk. Searching for compatible, high-quality tractor accessories or OEM parts can be frustrating, especially if you are pressed for time or need expert advice to avoid costly mistakes.
Take the hassle out of repairs by letting pexlivanidis.com support your maintenance journey. With over 20,000 parts in stock, clear product details, and simple ordering, you ensure your tractor gets back to work reliably and safely. Explore our extensive catalog and benefit from free shipping in Greece for orders over 100€. Ready to upgrade your repair process now? Visit pexlivanidis.com and experience fast part availability, unbeatable support, and tools that help you put your maintenance plans into action today.
Frequently Asked Questions
What are the first steps to assess my tractor’s condition?
Begin with a thorough visual and operational inspection, checking for signs of wear, damage, or unusual sounds. Inspect tire conditions, hydraulic lines, and listen for any irregular noises when starting the tractor.
How do I determine the right tools needed for tractor repair?
Compile a comprehensive tool collection based on your initial tractor assessment. Essential tools include precision wrenches, socket sets, torque wrenches, and electrical diagnostic tools, all specific to agricultural machinery.
What routine maintenance checks should I perform on my tractor?
Perform checks on fluid levels, component conditions, tire pressure, and lubrication points. Ensure fluids are clean, components are properly adjusted, and all moving parts are lubricated to prevent mechanical failures.
How can I effectively test my tractor after repairs?
Conduct a controlled startup procedure, monitoring the tractor’s initial performance. Perform hydraulic system tests and assess dynamic performance by driving across different terrains, checking for smooth operation and responsiveness.