

Did you know that regular tractor maintenance can extend equipment lifespan by over 40 percent? For anyone who relies on a tractor, preventing breakdowns and costly repairs is a big deal. Tackling upkeep may seem overwhelming at first, but knowing which steps to follow and which parts to focus on can save you serious time and money while keeping your machine running reliably.
Table of Contents
- Step 1: Gather Required Tools And Maintenance Parts
- Step 2: Inspect Fluid Levels And Engine Components
- Step 3: Clean And Replace Filters As Needed
- Step 4: Check Tire Condition And Air Pressure
- Step 5: Test Electrical And Safety Systems
- Step 6: Verify All Maintenance Points Are Completed
Quick Summary
| Key Point | Explanation |
|---|---|
| 1. Assemble essential tools and parts | Gather specialized tools and maintenance parts as per your tractor’s requirements for effective upkeep. |
| 2. Conduct thorough fluid and engine checks | Inspect all fluid levels and engine components regularly to identify issues early and prevent costly repairs. |
| 3. Regularly clean and replace filters | Maintain engine health by ensuring filters are cleaned or replaced as recommended in the manufacturer’s guidelines. |
| 4. Ensure proper tire maintenance | Regularly check tire condition, pressure, and inflation levels to enhance performance and safety during operation. |
| 5. Verify electrical and safety systems | Thoroughly inspect all electrical components and safety systems to prevent accidents and ensure reliable operation. |
Step 1: Gather Required Tools and Maintenance Parts
Before diving into tractor maintenance, you need to assemble the right tools and parts. According to workplace safety guidelines, tractor maintenance requires specialized tools that are typically larger than those used for automobiles.
Start by creating a comprehensive tool inventory. You will want an adjustable wrench set, socket wrenches in multiple sizes, screwdrivers with various tips, pliers, and a reliable jack stand for lifting heavy components. A high quality torque wrench is also crucial for precise tightening of critical fasteners.
For replacement parts, consult your tractor’s manual and track the machine’s usage hours carefully. As research from Alan Boswell suggests, following manufacturer guidelines can significantly extend your tractor’s lifespan. Typical replacement items to keep on hand include:
- Hydraulic fluid
- Engine oil
- Oil filters
- Fuel filters
- Air filters
- Spark plugs
- Belts
- Coolant
Pro tip: Always purchase parts specific to your tractor model. Generic replacements might save money upfront but can cause expensive damage down the line.
With your tools and parts assembled, you are now ready to begin systematic tractor maintenance.
Step 2: Inspect Fluid Levels and Engine Components
Now that your tools are ready, it is time to perform a comprehensive inspection of your tractor. According to research from agricultural machinery experts, conducting a complete walk-around inspection before starting the engine is critical for identifying potential performance or safety issues.
Begin with a visual inspection of the entire engine compartment. Check for any signs of wear or damage such as cracked hoses, loose connections, or unusual residue. Look closely at belts for fraying or excessive wear that might indicate imminent failure.
Next, systematically check all essential fluid levels. This includes engine oil, hydraulic fluid, coolant, and transmission fluid. Each of these systems requires specific fluid types and quantities recommended by your manufacturer. Use clean rags to wipe dipsticks and check markings carefully to ensure accurate readings.
As machinery experts at Ziegler AG recommend, daily inspections can help you catch minor issues before they become expensive repairs. Pay special attention to:
- Oil clarity and level
- Coolant condition
- Hydraulic fluid transparency
- Battery water levels
- Fuel system connections
Warning: Never open a hot radiator cap. Always wait for the engine to cool completely before checking coolant levels to prevent potential burns.
With your thorough inspection complete, you are now prepared to move forward with more detailed maintenance procedures.
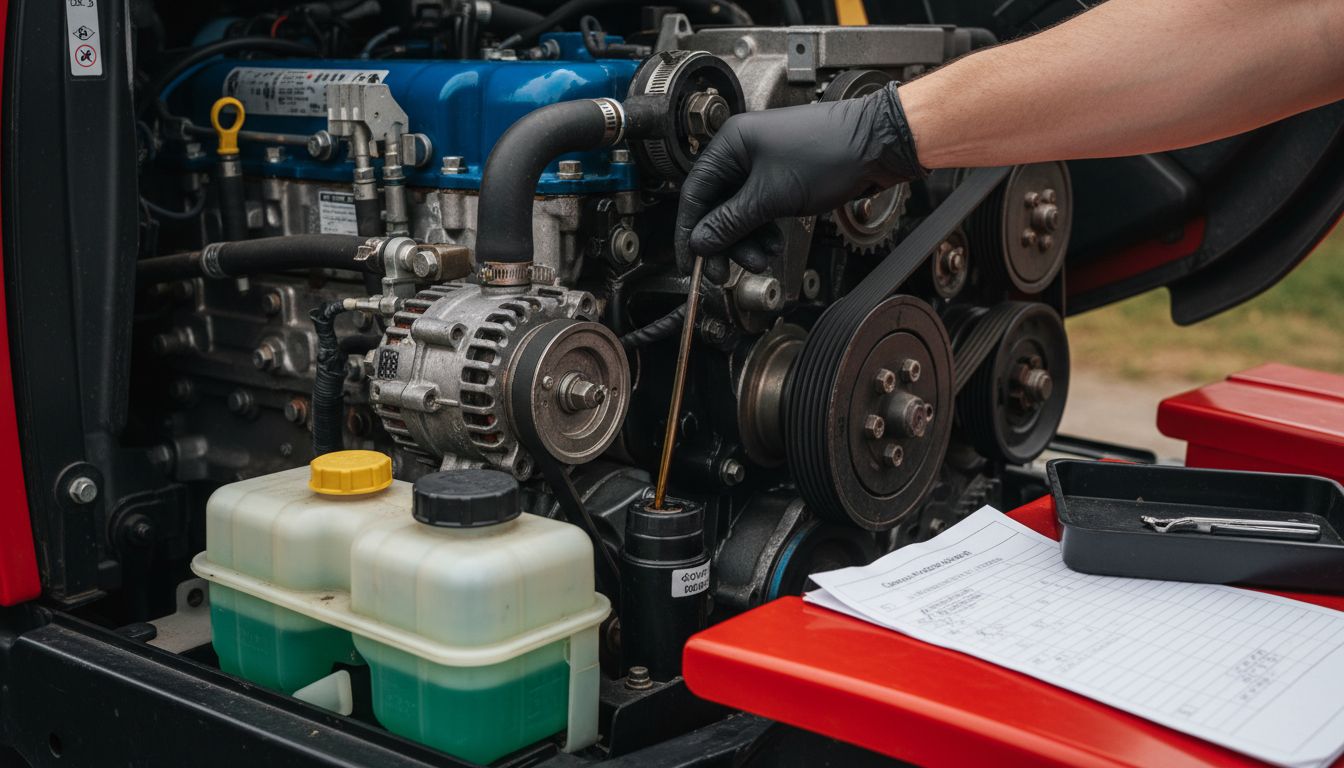
Step 3: Clean and Replace Filters as Needed
Filter maintenance is a critical aspect of keeping your tractor running smoothly. According to equipment maintenance experts, a tractor’s engine contains multiple filters that protect the system from harmful contaminants and require regular inspection and replacement.
Start by locating the different filters in your tractor. You will typically find air filters, fuel filters, hydraulic filters, and oil filters in various compartments. Each serves a unique purpose in preventing dirt and debris from damaging critical engine components.
Research from Number Analytics highlights that regular filter replacements are essential to maintaining your tractor’s engine health. Contaminated filters can significantly reduce engine performance and potentially lead to expensive mechanical failures.
When replacing filters, follow these key steps:
- Consult your tractor’s manual for specific filter types and replacement intervals
- Ensure you have the correct replacement filters before beginning
- Clean surrounding areas to prevent additional contamination during replacement
- Remove old filters carefully to avoid spilling trapped debris
- Install new filters according to manufacturer specifications
Pro tip: Mark the date of filter replacement on each new filter. This helps you track maintenance schedules and ensures timely replacements.
Warning: Always wear protective gloves when handling used filters. They can contain hazardous materials and potentially harmful residues.
With clean filters installed, your tractor is now better protected against potential system damage.
Step 4: Check Tire Condition and Air Pressure
Ensuring proper tire maintenance is crucial for your tractor’s performance and safety. According to maintenance experts, tire pressure plays a significant role in overall equipment functionality and can impact fuel efficiency and operational reliability.
Start by locating a tire pressure gauge and consulting your tractor’s technical documentation. As recommended by TVH maintenance guidelines, you should know the exact recommended pressure for each tire before beginning your inspection.
Visually inspect each tire thoroughly. Look for signs of wear such as uneven tread patterns, sidewall damage, cuts, or bulges that might compromise tire integrity. Run your hand along the tire surface feeling for any unusual bumps or irregularities that could indicate potential structural problems.
Measure tire pressure when the tires are cold for the most accurate reading. Insert the tire pressure gauge firmly onto the valve stem and record the current pressure. Compare this reading against the manufacturer’s recommended specifications. Some tractors have different pressure requirements for front and rear tires.
Key tire inspection points include:
- Checking tread depth
- Examining sidewall conditions
- Verifying proper inflation levels
- Looking for embedded debris or damage
- Ensuring even wear across the tire surface
Pro tip: Maintain a consistent tire pressure log. Tracking pressure changes over time can help you anticipate potential issues before they become serious problems.
Warning: Never exceed the maximum recommended tire pressure. Overinflation can cause tire blowouts and potentially dangerous equipment failures.
With your tires inspected and properly inflated, you are ready to move forward with the next stage of tractor maintenance.
Step 5: Test Electrical and Safety Systems
Electrical system maintenance is a critical component of keeping your tractor safe and operational. According to workplace safety experts, thoroughly checking steering mechanisms, control systems, warning devices, and electrical components can prevent potential accidents and equipment failures.
Begin with a comprehensive battery inspection. As recommended by maintenance professionals, carefully examine the battery terminals for signs of corrosion or buildup. Clean the terminals using a wire brush and protective gloves to ensure optimal electrical connection. Check that the battery cables are securely fastened and free from visible damage.
Next, systematically test all electrical systems. Turn on headlights, brake lights, and warning indicators to confirm they function correctly. Check the dashboard warning lights and ensure they illuminate and extinguish properly during startup. Test all electrical controls including horn, turn signals, and any additional electrical accessories specific to your tractor model.
Key safety system checks include:
- Verifying brake system responsiveness
- Testing emergency stop mechanisms
- Checking steering wheel alignment
- Examining control lever movements
- Inspecting protective guards and safety shields
Pro tip: Keep a small notebook to document each electrical system test. This helps you track potential issues and maintenance history over time.
Warning: Always disconnect the battery before performing detailed electrical inspections to prevent accidental shorts or electrical injuries.
With your electrical and safety systems thoroughly examined, you have significantly improved your tractor’s operational reliability and safety.
Step 6: Verify All Maintenance Points Are Completed
You have now reached the final stage of your tractor maintenance process. According to safety and operational experts, meticulously documenting and verifying each maintenance point is crucial for long term equipment performance and reliability.
Start by reviewing your maintenance checklist systematically. As recommended by Alan Boswell maintenance guidelines, go through each maintenance point methodically to ensure nothing has been overlooked. Create a comprehensive verification process that covers every aspect of the maintenance procedure you have just completed.
Carefully cross reference your actions with the manufacturer’s recommended service intervals and maintenance guidelines. Check off each completed task in your maintenance log. This documentation serves multiple purposes tracking your maintenance history and helping you anticipate future service requirements.
Key verification points include:
- Confirming all fluid levels are correct
- Verifying filter replacements are completed
- Checking that all electrical systems function properly
- Ensuring tire pressures are at recommended levels
- Reviewing any components that showed signs of wear
Pro tip: Use a waterproof maintenance log or digital tracking app to create a permanent record of your tractor’s service history. This can be invaluable for tracking performance and maintaining equipment value.
Warning: Do not consider maintenance complete until you have physically checked and documented every single maintenance point. Skipping even one step can lead to potential equipment failure.
With a thorough verification complete, your tractor is now ready for optimal performance and reliability.
Here’s a summary of the key maintenance steps and their main focus:
| Step | Main Task | Key Components Checked/Maintained |
|---|---|---|
| 1. Gather Tools & Parts | Assemble tools & parts | Wrenches Filters Fluids Belts |
| 2. Inspect Fluids & Engine | Check fluids & engine | Oil Coolant Battery Hoses |
| 3. Clean/Replace Filters | Maintain filtration | Air filter Fuel filter Oil filter |
| 4. Check Tires | Inspect & inflate tires | Tire pressure Tread Sidewalls |
| 5. Test Electrical & Safety | Assess systems | Battery Lights Brakes |
| 6. Verify Completion | Review and document | Maintenance log Checklists |
Keep Your Tractor Running Smoothly with Trusted Parts and Accessories
Maintaining your tractor’s reliability means addressing key challenges like ensuring the right fluid levels, replacing worn filters, checking tire condition, and verifying electrical systems. These essential steps require high-quality parts that fit perfectly and last longer. Avoid the frustration of delayed repairs or unexpected breakdowns by choosing genuine tractor parts designed to meet your machine’s specific needs.
At pexlivanidis.com, we understand the urgency of keeping your tractor in top shape. With over 20,000 products, including engine oils, filters, belts, and electrical components, you can find everything you need in one place. Benefit from free shipping in Greece on orders above 100€ and access tailored support whether you are a retail customer or a wholesale partner. Don’t wait until a minor issue becomes costly downtime. Visit our online store today and gear up for dependable tractor maintenance that protects your investment and boosts your farm’s productivity.
Frequently Asked Questions
What are the essential tools needed for tractor maintenance?
To perform tractor maintenance, gather tools like an adjustable wrench set, socket wrenches, screwdrivers, pliers, and a reliable jack stand. Create a checklist before you start to ensure you have all necessary tools on hand to avoid interruptions during maintenance.
How often should I inspect fluid levels in my tractor?
You should inspect fluid levels in your tractor before each use or at least once a week. Regularly checking fluids like engine oil, hydraulic fluid, and coolant helps prevent potential engine problems and extends the lifespan of your tractor.
What steps should I follow to clean and replace filters in my tractor?
Start by locating the air, fuel, hydraulic, and oil filters in your tractor. Consult your manual for replacement intervals, clean the surrounding areas, and ensure you install new filters according to the manufacturer’s specifications.
How can I check and maintain my tractor’s tires effectively?
To maintain your tractor’s tires, visually inspect them for wear and ensure they are inflated to the manufacturer’s recommended pressure. Measure the tire pressure when they are cold and maintain a log of pressure readings to track changes over time.
What should I do if I notice wear or damage during my tractor inspection?
If you spot wear or damage, prioritize addressing these issues immediately. Document the findings in your maintenance log and consult your tractor manual for specific repair or replacement guidelines to avoid further complications.
How can I verify that all maintenance steps have been completed correctly?
Review your maintenance checklist systematically to confirm each task is complete before considering the maintenance finished. Ensure all fluid levels, filters, and safety systems have been checked, and document each action in your maintenance log for future reference.