
Tractor repair is one of those jobs that can save you thousands and keep your machine in the fields for years. Over half of farmers report unexpected downtime due to missing or mismatched parts every season, which adds up fast. Most people think it is all about having the right replacement part on hand, but surprisingly, the real secret lies in how you plan the whole repair process from the very first inspection.
Table of Contents
- Step 1: Assess Your Tractor’s Needs For Replacement Parts
- Step 2: Gather Necessary Tools And Components
- Step 3: Safely Prepare Your Tractor For Repair
- Step 4: Remove The Damaged Tractor Parts
- Step 5: Install New Tractor Parts Appropriately
- Step 6: Test And Validate The Repairs Made
Quick Summary
| Key Point | Explanation |
|---|---|
| 1. Assess tractor needs thoroughly | Conduct a detailed inspection to identify damaged parts and operational issues before ordering replacements. |
| 2. Prepare tools and parts carefully | Gather necessary tools and compatible replacement parts to streamline the repair process and avoid delays. |
| 3. Ensure safety during repairs | Always stabilize the tractor, disconnect the battery, and wear protective gear to prevent accidents. |
| 4. Document part removal accurately | Take photos or sketches to guide reinstallation and ensure accurate component placement. |
| 5. Test repairs methodically | After installation, perform thorough testing to confirm proper recovery and maintenance of tractor performance. |
Step 1: Assess Your Tractor’s Needs for Replacement Parts
Successful tractor maintenance begins with a thorough and systematic assessment of your equipment’s specific replacement part requirements. Understanding your tractor’s precise needs will save you time, money, and potential frustration during the repair process.
Carefully examining your tractor involves several critical considerations. Start by performing a comprehensive visual inspection of the machine, looking for signs of wear, damage, or mechanical stress. Check critical components like hydraulic systems, transmission parts, engine components, and electrical connections for any visible deterioration or performance issues.
Documenting the specific model and serial number of your tractor is crucial for accurate parts identification. Different tractor models have unique specifications, and manufacturers often produce slight variations that require precise matching. This step prevents costly mistakes in part selection. When recording these details, pay special attention to:
- Exact tractor make and model
- Year of manufacture
- Current operating hours
- Specific mechanical system requiring replacement
Before purchasing replacement parts, gather additional context about your tractor’s operational history. Understanding how the machine has been used provides valuable insights into potential wear patterns. Factors like terrain type, maintenance frequency, storage conditions, and previous repairs can significantly influence which components might need replacement.
Consult your tractor’s original maintenance manual or manufacturer documentation for specific guidance on recommended replacement intervals and diagnostic procedures. Professional mechanics often recommend tracking maintenance records to predict potential part failures before they occur.
A systematic approach to assessing replacement needs involves checking both external and internal mechanical systems. Listen for unusual sounds, monitor performance inconsistencies, and track any recent declines in operational efficiency. These subtle indicators can reveal underlying issues that might require targeted part replacements.
By meticulously assessing your tractor’s specific needs, you create a solid foundation for an effective and efficient parts replacement strategy. This preparation minimizes potential errors and ensures you select the most appropriate components for your agricultural equipment.
This table provides an overview of each step involved in replacing tractor parts, including a brief purpose for each and indicators of relative difficulty for quick planning.
| Step | Purpose | Estimated Difficulty (1-5) |
|---|---|---|
| Assess tractor needs | Identify damaged/worn parts and specific part requirements | 2 |
| Gather tools and components | Prepare all required equipment and compatible replacement parts | 2 |
| Prepare tractor safely | Stabilize machine and ensure safe working conditions | 3 |
| Remove damaged parts | Extract old or faulty parts without causing further damage | 3 |
| Install new parts | Attach new components correctly and verify fit | 3 |
| Test and validate repairs | Ensure full restoration and address any new issues | 2 |
Step 2: Gather Necessary Tools and Components
Preparing for tractor part replacement requires strategic planning and precise tool selection. This critical step ensures you have everything needed to complete the repair efficiently and safely, minimizing potential interruptions or complications during the maintenance process.
Building a comprehensive toolkit is fundamental to successful tractor repairs. Professional mechanics recommend assembling a dedicated set of tools specifically for agricultural equipment maintenance. Your core toolkit should include high-quality wrenches, socket sets, torque wrenches, precision measuring tools, and hydraulic jack stands capable of supporting heavy machinery.
Safety equipment is equally important when working with complex mechanical systems. Always include personal protective gear such as heavy-duty work gloves, safety glasses, steel-toed boots, and ear protection. These items protect you from potential injuries while working with heavy parts and powerful machinery.
When selecting replacement components, prioritize precision and compatibility. Verify the exact specifications of the parts needed by cross-referencing your tractor’s manual, model number, and previous assessment. Recommended items to gather include:
- Original manufacturer replacement parts
- Equivalent high-quality aftermarket components
- Specialized lubricants or sealants
- Cleaning materials for preparing installation surfaces
Agricultural machinery experts strongly recommend having a clean, well-organized workspace before beginning any repair work. Arrange your tools systematically, ensuring each is easily accessible and in good working condition. Lay out replacement parts on a clean surface, and organize them according to the sequence of installation.
Consider creating a detailed inventory checklist before starting the repair. This approach helps track each tool and component, reducing the likelihood of misplacing critical items during the replacement process. Digital or physical checklists can serve as excellent reference points, especially for complex repairs involving multiple components.
The following table summarizes the essential tools, safety equipment, and materials recommended for tractor parts replacement, along with their primary purpose and key specifications.
| Item | Purpose | Key Details/Specs |
|---|---|---|
| High-quality wrenches | Loosening/tightening bolts and fasteners | Assorted sizes for various components |
| Socket sets | Versatile fastening and removal | Metric and SAE sizes, deep sockets |
| Torque wrenches | Ensuring accurate fastening torque | Adjustable, calibrated |
| Precision measuring tools | Measuring alignment and clearances | Calipers, micrometers |
| Hydraulic jack stands | Safely elevating/stabilizing tractor | Rated for tractor weight |
| Work gloves | Protecting hands from injury | Heavy-duty, puncture-resistant |
| Safety glasses | Eye protection during repairs | Impact-resistant |
| Steel-toed boots | Preventing foot injuries | Meets ASTM safety standards |
| Cleaning materials | Prepping installation surfaces | Lint-free cloths, cleaning solution |
Budget adequate time for gathering and preparing your tools and parts. Rushing this preparatory stage can lead to costly mistakes or incomplete repairs. By investing careful attention in tool and component selection, you set the stage for a successful and efficient tractor maintenance experience.
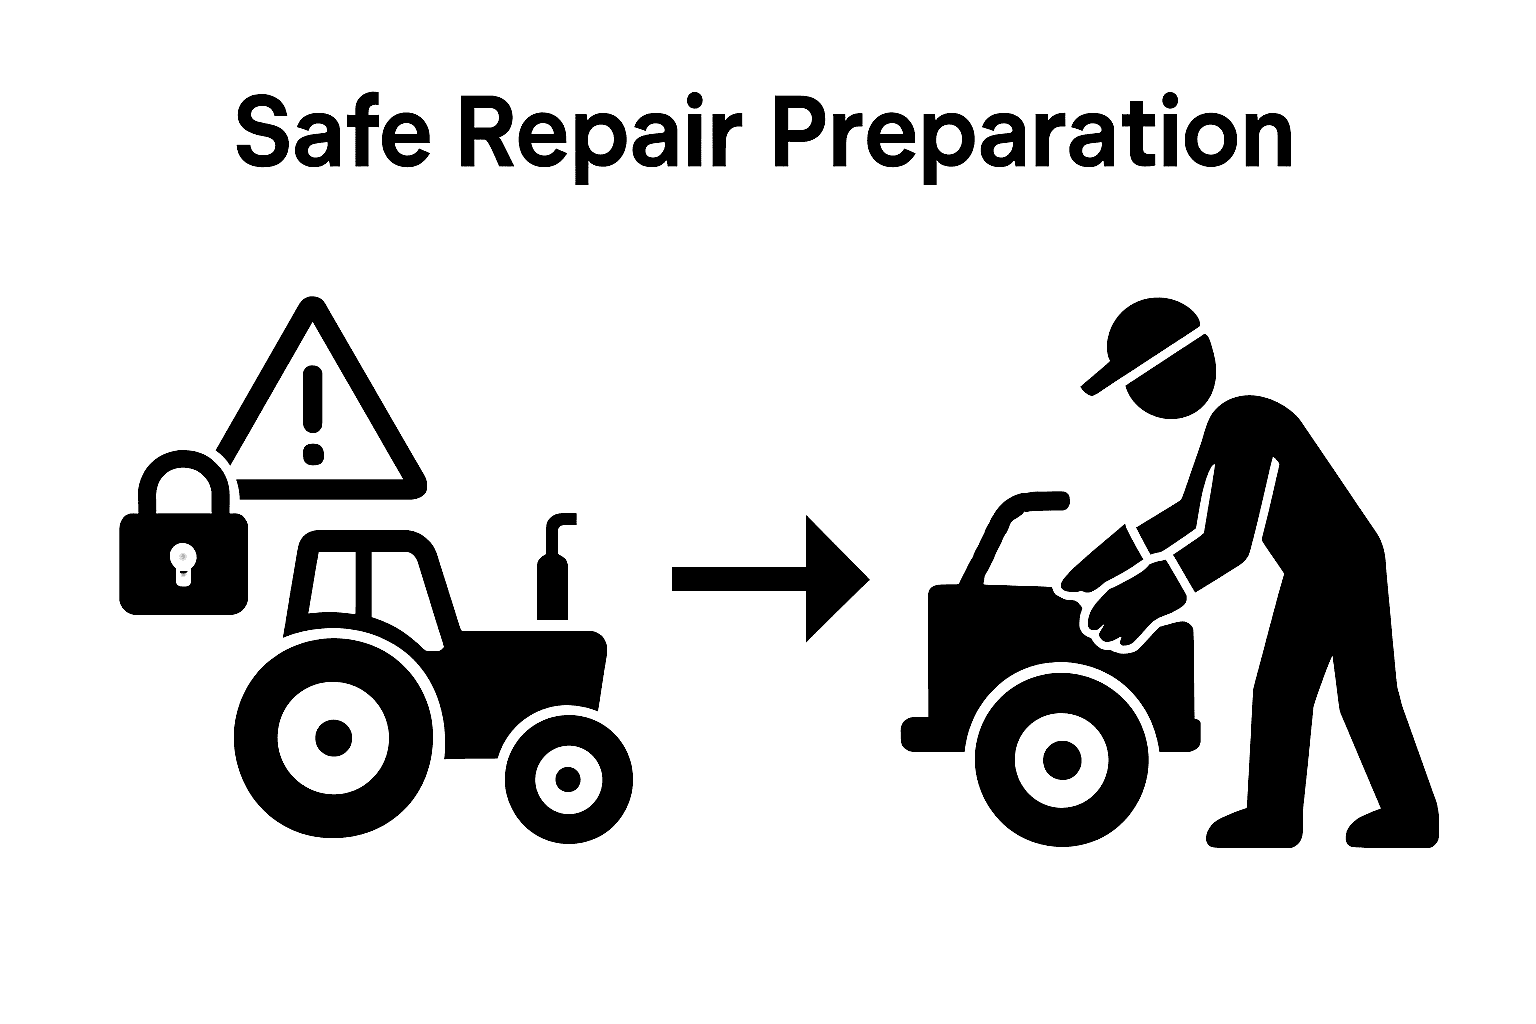
Step 3: Safely Prepare Your Tractor for Repair
Preparing your tractor for repair involves creating a secure environment that protects both the equipment and the person performing maintenance. Safety and systematic preparation are paramount to preventing accidents and ensuring a smooth repair process.
Begin by selecting an appropriate workspace with a flat, stable surface that provides ample room for maneuvering. Outdoor concrete or a level workshop floor offers the best foundation for your repair work. Ensure the area is well-ventilated, properly lit, and free from potential hazards like loose debris or flammable materials.
Before starting any repair work, completely shut down the tractor’s engine and remove the ignition key. Disconnect the battery by removing the negative terminal first, which prevents potential electrical shorts or accidental starts. This critical safety step eliminates the risk of unexpected movement or electrical system complications during your repair.
Stabilizing the tractor is crucial for safe maintenance. Use robust jack stands or hydraulic lifts rated for the tractor’s weight to support the machine securely. Agricultural safety experts recommend using wheel chocks on both sides of the tires to prevent any potential rolling or movement during the repair process.
Additional critical safety preparations include:
- Wearing appropriate personal protective equipment
- Clearing the immediate work area of unnecessary tools or obstacles
- Ensuring a fire extinguisher is nearby
- Having a first aid kit readily accessible
Carefully inspect the specific area where you will be replacing parts. Clean the surrounding surface to remove dirt, grease, or debris that could interfere with your repair work. This preparation not only creates a safer working environment but also helps you identify any additional issues that might not have been apparent during initial assessment.
Make sure you have adequate lighting and consider using portable work lights to illuminate hard-to-see areas. Position these lights to minimize shadows and provide clear visibility of your working area. Take time to mentally walk through the repair process, identifying potential challenges or areas that might require extra attention.
Before proceeding, do a final safety check. Confirm that the tractor is completely stable, all necessary tools are within reach, and you have a clear understanding of the repair steps. This methodical approach ensures you are fully prepared to begin the part replacement process safely and efficiently.
Step 4: Remove the Damaged Tractor Parts
Removing damaged tractor parts requires precision, patience, and a methodical approach. This crucial stage demands careful attention to prevent additional damage to surrounding components and ensure a smooth replacement process.
Begin by thoroughly examining the damaged part and its connection points. Carefully document the current configuration by taking photographs or creating detailed sketches that capture the exact positioning of the component. This visual reference will prove invaluable during the reinstallation process, helping you understand the precise orientation and connections.
Use specialized tools appropriate to the specific component you are removing. Different parts may require unique approaches. For instance, hydraulic system components often need careful disconnection to prevent fluid leakage, while electrical parts demand careful wire management. Work systematically, removing fasteners and connections in a logical sequence that minimizes stress on surrounding mechanical systems.
Agricultural machinery technicians recommend labeling each disconnected component and its corresponding fasteners. Use small plastic bags or magnetic trays to organize screws, bolts, and smaller parts, preventing loss and ensuring easy reassembly later.
Critical considerations during part removal include:
- Maintaining a clean work surface
- Tracking the order of component removal
- Protecting surrounding mechanical systems
- Preventing contamination of open connections
Pay special attention to sealed or pressurized systems. When working with hydraulic or pneumatic components, use appropriate containment methods to capture any residual fluids. Have clean rags, drip pans, and proper disposal containers ready to manage potential spills or leaks.
Proceed with deliberate, controlled movements. Avoid using excessive force, which could damage adjacent components or create additional repair needs. If a part seems stuck, pause and reassess. Sometimes applying penetrating lubricant or using specialized extraction tools can help release stubborn connections without causing mechanical stress.
Once the damaged part is removed, conduct a thorough inspection of the surrounding area. Look for signs of wear, corrosion, or additional damage that might have been hidden by the original component. This careful examination can help prevent future issues and ensure a more comprehensive repair strategy.
Verify that all connections have been properly disconnected and the part can be safely removed without causing additional mechanical strain. Take your time, remain patient, and prioritize precision over speed throughout this critical removal process.
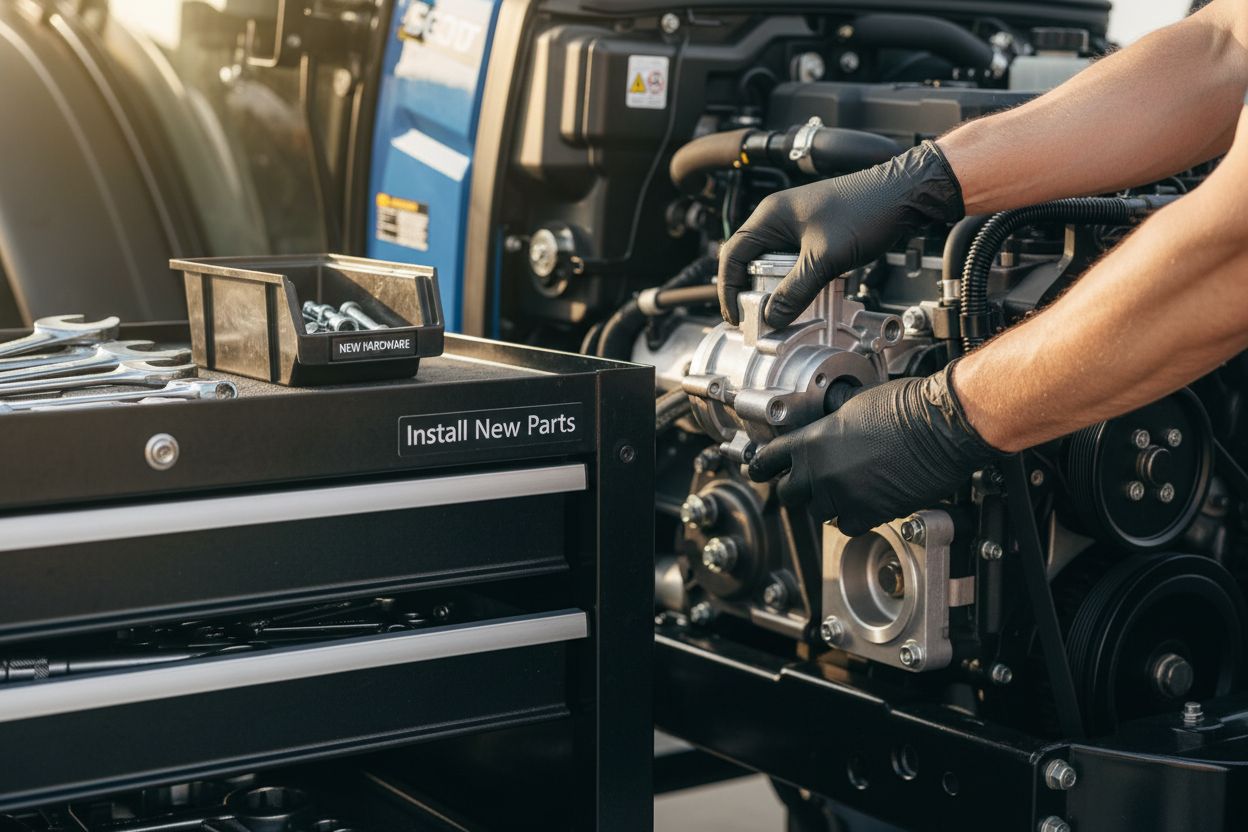
Step 5: Install New Tractor Parts Appropriately
Installing new tractor parts demands precision, careful alignment, and a systematic approach that ensures optimal performance and long-term reliability. This critical stage transforms your repair efforts from preparation to actual mechanical restoration.
Begin by thoroughly cleaning the installation area, removing any residual debris, old gasket material, or corrosion from the mounting surfaces. Pristine connection points are essential for creating a secure and effective seal between the new component and surrounding mechanical systems. Use specialized cleaning solutions and lint-free cloths to prepare the surfaces, ensuring a contamination-free environment.
Carefully compare the new replacement part with the original component, verifying exact specifications and mounting configurations. Check for any slight variations that might require additional adjustments or specialized fitting techniques. Pay close attention to alignment markers, mounting holes, and connection points to guarantee precise installation.
Agricultural equipment maintenance experts recommend following a systematic installation sequence. Begin by positioning the new part carefully, using minimal force and ensuring perfect alignment before initiating any fastening process. Gradually and evenly tighten mounting hardware, alternating between different attachment points to distribute pressure uniformly.
Critical installation considerations include:
- Using manufacturer-recommended torque specifications
- Applying appropriate lubricants to moving parts
- Checking for smooth movement and proper fit
- Verifying all connection points are secure
Special attention must be given to components involving fluid systems or electrical connections. Ensure proper sealing of hydraulic lines, apply thread sealants where necessary, and double-check electrical connections for correct polarity and secure attachment. Use calibrated torque tools to achieve precise tightening without risking over-compression or mechanical stress.
If the new part requires additional calibration or adjustment, proceed carefully. Some components might need specific alignment procedures or preliminary settings before full operational testing. Consult your tractor’s maintenance manual for detailed guidance on these nuanced installation requirements.
Once installation is complete, perform a comprehensive visual inspection. Verify that all fasteners are correctly positioned, connection points are clean and secure, and the new part integrates seamlessly with surrounding mechanical systems. Take your time during this process, prioritizing accuracy over speed to ensure a successful and reliable repair.
Step 6: Test and Validate the Repairs Made
Validating tractor repairs represents the final and most critical phase of your maintenance process. This crucial step ensures that the parts replacement has successfully restored your equipment’s performance and prevents potential future mechanical failures.
Initiate testing by first performing a comprehensive pre-start visual inspection. Walk around the tractor, carefully examining all areas where repairs were conducted. Look for any loose connections, unexpected fluid leakages, or signs of improper installation. Check that all protective covers and shields have been correctly repositioned and secured.
When starting the tractor, begin with a controlled, low-speed startup. Listen carefully for any unusual sounds such as grinding, knocking, or unexpected vibrations that might indicate incomplete or improper repairs. Pay special attention to the specific system or component you have just replaced, monitoring its immediate performance characteristics.
Agricultural machinery experts recommend a systematic testing approach that gradually increases operational complexity. Start by running the tractor in a stationary position, observing hydraulic pressure, electrical system responses, and mechanical integration of the new parts.
Key validation steps include:
- Checking all fluid levels and potential leakage points
- Verifying electrical system connectivity
- Monitoring temperature and pressure gauges
- Testing functional movements of replaced components
Progress to controlled movement tests, initially in an open, safe area away from obstacles. Evaluate the tractor’s performance across different operational speeds and under various load conditions. Look for smooth functionality, consistent power delivery, and absence of previous performance issues that prompted the part replacement.
Document your testing process meticulously. Record observations about the tractor’s performance, including any subtle changes or potential concerns. This documentation serves as a valuable reference for future maintenance and helps track the effectiveness of your repair work.
Remember that successful validation extends beyond immediate performance. Monitor the tractor’s operation over subsequent work sessions, paying attention to any emerging issues or performance variations. A thorough testing approach ensures not just immediate repair success, but long-term operational reliability and equipment integrity.
Restore Your Tractor’s Performance with the Right Parts
Struggling to identify and replace worn tractor parts can slow down your entire operation. As this step-by-step guide explained, successful maintenance depends on finding exact-fit components and having reliable access to a large inventory. It is frustrating to face uncertainty about compatibility, wait for slow deliveries, or hunt for obscure parts just when your machine needs urgent attention.
Experience a smoother repair and avoid downtime by shopping with Pexlivanidis. Explore over 20,000 agricultural and tractor spare parts at pexlivanidis.com where you will find detailed product information, quick search tools, and expert support for both retail and wholesale customers. Get fast answers to your part availability questions with our easy inquiry forms and enjoy free shipping throughout Greece on qualifying orders. Ready to maximize your tractor’s reliability? Find the parts you need now and take the next step toward hassle-free maintenance.
Frequently Asked Questions
How do I assess my tractor’s needs for replacement parts?
Start with a comprehensive visual inspection of your tractor, checking critical components for signs of wear or damage. Document your tractor’s model, year of manufacture, and current operating hours to assist in accurate parts identification.
What tools do I need to replace tractor parts?
You’ll need high-quality wrenches, socket sets, torque wrenches, precision measuring tools, and hydraulic jack stands. Don’t forget personal protective gear like gloves and safety glasses for your safety during repairs.
How can I prepare my tractor safely for repairs?
Begin by selecting a flat, stable workspace and completely shut down the tractor. Disconnect the battery, then stabilize the tractor with jack stands and wheel chocks. Ensure your work area is clean and well-lit for optimal safety.
What steps should I take to validate the repairs I made on my tractor?
Perform a pre-start visual inspection to check for loose connections or leaks. Start the tractor at low speed and listen for unusual sounds. Gradually increase operational complexity to test the performance of the replaced components in various conditions.