

TL;DR:
- Proper tractor tire replacement involves using the correct tools and safety procedures to prevent machine and operator damage. Following detailed steps ensures the tire is mounted, seated, and torqued correctly, maintaining safety and performance. Matching the tire type and specifications to the tractor’s load requirements helps prevent early wear, failure, and accidents.
Tractor tire replacement is the process of safely removing a worn or damaged tire from an agricultural tractor’s rim and installing a new one using the correct tools, torque specifications, and safety procedures. Getting this right protects both the operator and the machine. A tire that fails mid-season can halt fieldwork at the worst possible time. Following the correct tractor tire replacement steps, from stabilizing the tractor to seating the bead and torquing the lug nuts, keeps your equipment running safely and your operation on schedule.
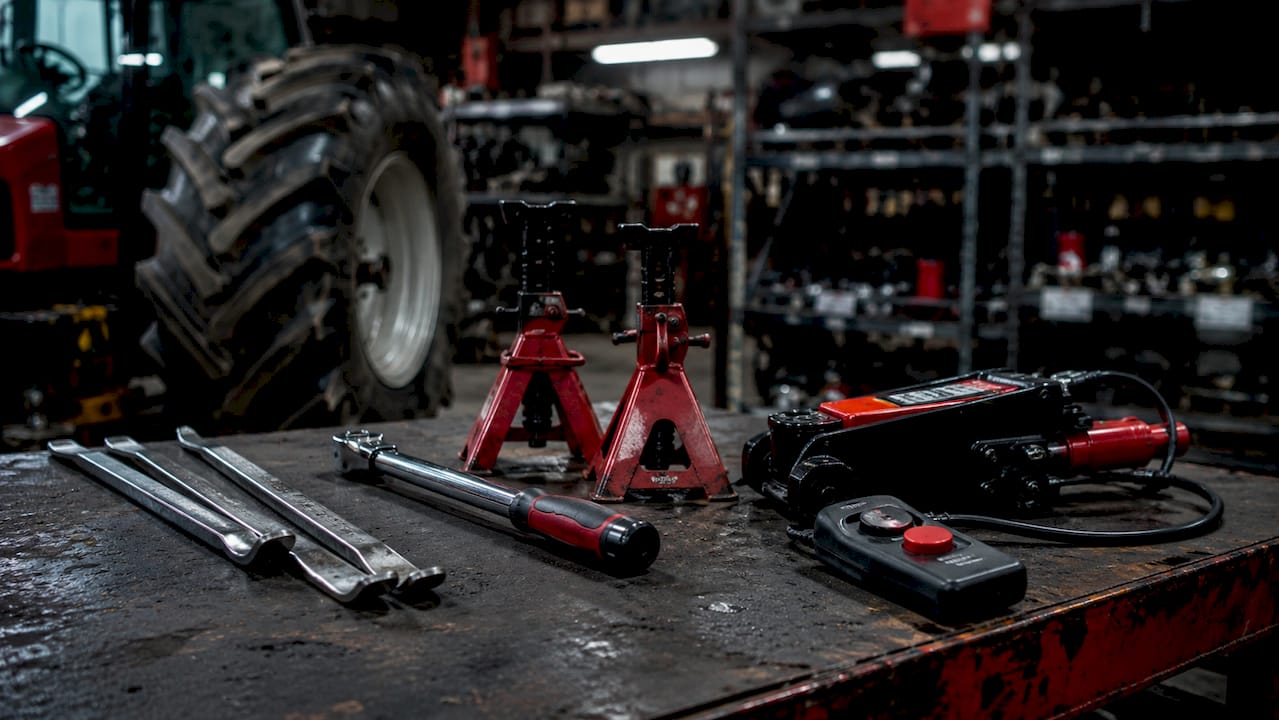
What tools do you need for tractor tire replacement?
The right tools make the difference between a safe, controlled job and a dangerous one. Gather everything before you start. Stopping mid-job to hunt for a wrench creates unnecessary risk.
Essential tools:
- Floor jack or hydraulic bottle jack rated for your tractor’s weight
- Lug wrench and torque wrench
- Bead breaker (screw-type models work well and cost under $50)
- Tire irons or tire levers
- Valve stem tool
- Ratcheting tie-down strap
Safety equipment:
- Heavy-duty work gloves
- Safety glasses
- Wheel chocks (front and rear of the stationary wheels)
- Jack stands rated for the tractor’s load
Pro Tip: Use curved or C-bar tire levers rather than straight bars. Curved levers give you better leverage and keep your body out of the crush zone if a lever slips.
The table below shows each tool and its specific role in the job.
| Tool / Equipment | Purpose |
|---|---|
| Hydraulic jack | Lifts the tractor wheel off the ground safely |
| Torque wrench | Tightens lug nuts to manufacturer specifications |
| Bead breaker | Breaks the tire bead free from the rim |
| Tire irons / levers | Pry the tire on and off the rim |
| Ratcheting tie-down strap | Seats the bead during inflation |
| Wheel chocks | Prevents tractor from rolling during the job |
| Jack stands | Supports the tractor frame while the wheel is off |
| Valve stem tool | Removes and installs valve cores cleanly |
Never skip the jack stands. A jack alone is not a stable support. If the jack slips, the tractor comes down fast.
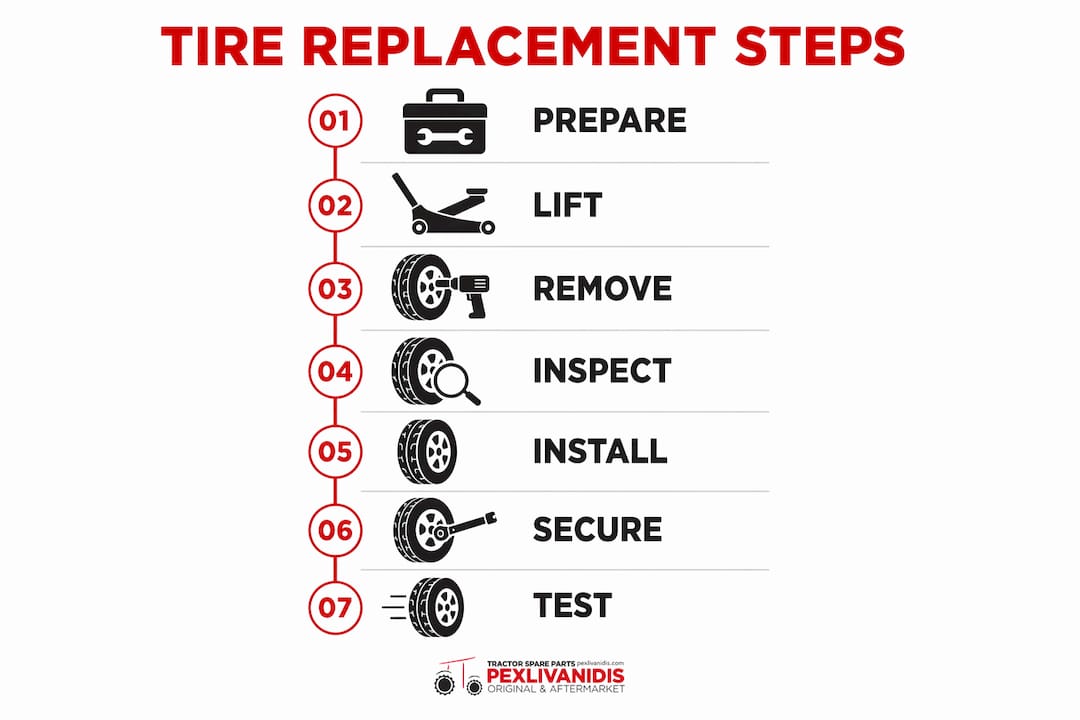
Step-by-step tractor tire replacement procedure
This procedure covers a standard wheel-off replacement on a medium farm tractor. Work on a flat, firm surface. Grass or soft soil can shift under a loaded jack.
- Park and stabilize the tractor. Engage the parking brake. Place wheel chocks against the tires you are not removing. Secure the tractor with chocks and rated jack stands before lifting anything.
- Loosen the lug nuts before jacking. Break each lug nut loose while the tire is still on the ground. The tire’s contact with the ground prevents the wheel from spinning. Do not remove the nuts yet.
- Jack the tractor up. Position the jack under the manufacturer’s recommended lift point. Raise the wheel 6–8 inches off the ground. That height gives you enough clearance to work without over-extending the jack.
- Place jack stands. Slide rated jack stands under the tractor frame. Lower the jack slowly until the tractor rests on the stands. The jack stays in place as a backup.
- Remove the lug nuts and wheel. Finish removing the lug nuts and pull the wheel straight off the hub. Set it flat on the ground. Tractor wheels are heavy. Get help if needed.
- Deflate the tire completely. Remove the valve core with your valve stem tool. Press the valve to release all remaining air. Never break the bead on an inflated tire.
- Break the bead. Position the screw-type bead breaker against the tire sidewall, close to the rim edge. Work around the full circumference on both sides. The bead will pop free from the rim flange.
- Remove the old tire from the rim. Insert tire levers between the tire bead and the rim. Work in small sections, prying the bead over the rim edge. Repeat on the second bead. The tire comes free.
- Inspect the rim. Check for rust, cracks, or corrosion before mounting the new tire. A damaged rim will cause the new tire to fail. Address any issues before continuing.
- Mount the new tire. Apply a thin layer of tire mounting lubricant to both beads and the rim flanges. Start one bead over the rim by hand, then use tire levers to work it fully onto the rim. Repeat for the second bead.
- Seat the bead. Wrap a ratcheting tie-down strap around the tire tread. Tighten the strap to push the beads outward against the rim flanges. Inflate the tire slowly. You will hear two distinct pops as each bead seats. Remove the strap immediately after both beads seat.
- Reinstall the wheel and torque the lug nuts. Mount the wheel on the hub and hand-tighten the lug nuts in a star pattern. Lower the tractor off the jack stands. Use a torque wrench to tighten the lug nuts to the manufacturer’s specified torque. Never guess on torque. Over-tightening warps the hub; under-tightening lets the wheel work loose.
- Check tire pressure. Inflate to the pressure listed in your tractor manual. Pressure requirements vary by load and tire ply rating. Recheck pressure after the first hour of field use.
Pro Tip: Consult your tractor tire selection guide before purchasing a replacement. Matching ply rating and load capacity to your tractor’s requirements prevents premature wear and blowouts.
What are the most common problems during tire replacement?
Even experienced operators run into trouble. Knowing what to expect cuts downtime and prevents injury.
Common problems and how to handle them:
- Stubborn bead. If the bead will not break with a screw-type breaker, check that the tire is fully deflated. A trace of air pressure makes the bead nearly impossible to move.
- Air leaks after mounting. The bead may not be fully seated. Deflate, reapply lubricant, and re-inflate using the ratcheting strap method.
- Rim corrosion. Surface rust is normal. Clean it with a wire brush before mounting. Deep rim corrosion, especially after liquid ballast use, requires rim replacement. A corroded rim can collapse under load and crush the operator.
- Valve stem leaks. Before replacing the whole tire, try cleaning the valve stem or installing a new inner tube. Both fixes cost far less than a full tire swap.
- Tire won’t hold air. Inspect the bead seat area on the rim for debris or damage. A small piece of dirt or rust between the bead and rim is enough to cause a slow leak.
Rim failure from corrosion is one of the most underestimated hazards in tractor tire work. A rim that looks solid can collapse without warning under inflation pressure or load. If you see deep pitting or flaking metal, replace the rim before mounting any tire.
Pro Tip: Never work under a tractor supported only by a jack. Always use rated jack stands. If you are working alone, tell someone where you are and what you are doing before you start.
Avoid these mistakes that operators commonly make:
- Breaking the bead on a partially inflated tire
- Using straight tire irons that put your body in the crush zone
- Skipping the torque wrench and tightening lug nuts by feel
- Ignoring rim condition before mounting a new tire
- Forgetting to recheck tire pressure after the first field use
How do you choose the right replacement tire?
Tire selection is not guesswork. The wrong tire can fail under load, damage the rim, or reduce traction at the worst moment.
Start with your tractor’s operator manual. It lists the approved tire sizes, ply ratings, and rim widths for each axle position. Do not deviate from those specifications without consulting a qualified tire technician.
Key factors in tire selection:
- Load capacity and ply rating. The load capacity and ply rating must meet or exceed the tractor’s rated load plus any implement weight. Improper inflation is the primary cause of uneven wear and early tire failure.
- Tread pattern. R-1 tires (standard ag tread) work well in most field conditions. R-1W tires have deeper lugs for wet or muddy ground. R-4 industrial tires suit loader work and hard surfaces. R-3 turf tires minimize ground disturbance for orchard or lawn applications.
- Inflation pressure. Correct pressure varies by load and speed. Running too low causes sidewall flex and heat buildup. Running too high reduces traction and increases soil compaction.
- Valve integrity. Always install a new valve stem when mounting a new tire. A worn valve is a common source of slow leaks that are hard to trace.
For ongoing tire pressure management, the guide on keeping your tractor in condition covers monitoring routines that extend tire life significantly.
| Tire type | Best use case |
|---|---|
| R-1 (standard ag) | General field work, row crops, dry to moderate conditions |
| R-1W (wide lug) | Wet fields, muddy conditions, heavy draft work |
| R-4 (industrial) | Loader work, hard surfaces, construction sites |
| R-3 (turf) | Orchards, lawns, low ground disturbance applications |
Matching the tire type to your primary task protects both the tire and the soil. Using an R-4 tire in a wet field, for example, reduces traction and increases fuel consumption.
Key Takeaways
Correct tractor tire replacement requires the right tools, strict safety protocols, and a tire matched to your tractor’s load and ply rating specifications.
| Point | Details |
|---|---|
| Safety first | Use wheel chocks, rated jack stands, and a parking brake before lifting the tractor. |
| Torque matters | Always use a torque wrench to tighten lug nuts to the manufacturer’s specification. |
| Bead seating | A ratcheting tie-down strap seats stubborn beads safely; remove it immediately after inflation. |
| Rim inspection | Check for deep corrosion before mounting a new tire; a failed rim can collapse under load. |
| Tire selection | Match load capacity, ply rating, and tread pattern to your tractor’s manual specifications. |
What I’ve learned from watching operators rush tractor tire work
The most expensive tractor tire mistakes I have seen did not happen during the tire change itself. They happened in the two minutes before it started. An operator skips the wheel chocks because the ground looks flat. Another skips the torque wrench because the lug nuts feel tight. Both shortcuts look harmless until they are not.
Keeping the wheel mounted on the tractor during bead breaking is a technique worth adopting. The tractor’s weight gives you a stable platform, and you avoid the heavy lifting of pulling the full wheel assembly off first. A screw-type bead breaker makes this approach practical for most farm operators without a tire shop’s equipment.
The inner tube question also comes up more than people expect. If a tire is structurally sound but will not hold air, a new inner tube or a cleaned valve stem often solves the problem at a fraction of the cost of a full replacement. Check the parts replacement decision guide before committing to a full tire swap.
Preventive inspection is the real time-saver. Check tire pressure before every major field operation. Look at sidewalls for cracking or bulging. Catch a slow leak in the yard, not in the middle of a field two kilometers from the barn.
— George
Pexlivanidis: parts and guides for agricultural machinery maintenance
Pexlivanidis stocks over 20,000 agricultural machinery parts, including tractor tires, valve stems, rim components, and the tools needed for field maintenance. Whether you are sourcing a single replacement part or stocking up for a full season, the catalog covers both retail and wholesale needs. The guides on essential machinery parts and peak performance maintenance give you the technical background to make confident purchasing decisions. Operators in Thessaloniki, Kavala, and surrounding regions can also contact Pexlivanidis directly for part availability and technical support.
FAQ
What is the correct jack height for tractor tire replacement?
Lift the wheel 6–8 inches off the ground. That height provides enough clearance to remove and reinstall the wheel without over-extending the jack.
How do I seat a stubborn tire bead?
Wrap a ratcheting tie-down strap around the tire tread to push the beads outward, then inflate slowly. Remove the strap immediately after both beads seat with an audible pop.
When should I replace the rim instead of just the tire?
Replace the rim when you find deep corrosion or pitting, especially after liquid ballast use. A severely corroded rim can collapse under inflation pressure or field load.
Do I need a torque wrench for lug nuts?
Yes. Tightening lug nuts to the manufacturer’s torque specification prevents hub warping from over-tightening and wheel loosening from under-tightening. A torque wrench is not optional on tractor wheel work.
How do I know which replacement tire fits my tractor?
Check your tractor’s operator manual for the approved tire size, ply rating, and rim width for each axle. The load capacity and ply rating must meet or exceed the tractor’s rated load plus any attached implement weight.