
TL;DR:
- Regular, structured maintenance helps Greek farmers prevent costly machinery breakdowns during harvest season. Proper safety procedures, interval checks, and timely servicing of hydraulic, transmission, and engine systems are crucial for reliability. Using OEM parts and keeping detailed service records optimize equipment lifespan and reduce unexpected failures.
A breakdown in the middle of harvest season is not just frustrating. It is expensive, and in Greek agriculture, where timing between olive picking, wheat cutting, and vineyard work is everything, a stalled tractor can cost you far more than a repair bill. Most machinery failures are not accidents. They are the result of missed steps, forgotten intervals, and incomplete records that quietly accumulate until something gives. This guide walks you through a structured, step-driven servicing system that keeps your equipment running reliably, season after season, from pre-start checks to hydraulic maintenance and seasonal preparation.
Table of Contents
- What you need before starting: Tools, checklist, and safety
- Daily and interval checks: The core workflow
- Seasonal servicing in Greece: Winter, spring, summer, fall
- Servicing hydraulic and transmission systems: Expert steps
- Troubleshooting and preventing common mistakes
- A smarter way: Servicing as a system, not a chore
- Next steps: Reliable parts and smarter upgrades
- Frequently asked questions
Key Takeaways
| Point | Details |
|---|---|
| Daily and interval checks | Regular inspections and service at set hour markers are essential for farm machinery reliability. |
| Record and diagnose | Logging all findings and step-by-step troubleshooting helps catch issues before they become critical. |
| Seasonal adaptation | Tailoring maintenance for Greek seasonal climates prevents major failures and keeps equipment running strong. |
| OEM parts matter | Using authentic parts reduces downtime and extends your machinery’s life. |
What you need before starting: Tools, checklist, and safety

Every solid servicing session begins before you touch the machine. Jumping straight into work without the right tools or a clear plan is where mistakes happen. Setting up properly takes ten minutes and saves hours of rework.
Essential tools and supplies:
- Basic hand tools: wrenches, sockets, screwdrivers, pliers
- Drain pans and funnels for fluid changes
- Protective gloves, safety glasses, and steel-toed boots
- A torque wrench for critical fasteners
- Fresh rags and a parts cleaning brush
- A printed or digital service checklist
- Manufacturer-approved fluids and genuine OEM part benefits
Record keeping matters from day one. Start a logbook or a simple phone app where you note the date, hour meter reading, tasks completed, and any issues spotted. This habit alone separates operators who catch problems early from those who react to failures. A structured maintenance log and consistent OEM-quality parts help reduce repeated downtime and support long-term reliability.
Safety steps before every service session:
| Safety step | Why it matters |
|---|---|
| Engine fully off, keys removed | Prevents accidental start-up |
| Parking brake on, wheels chocked | Stops unexpected movement |
| Machine cooled down | Avoids burns from hot fluids |
| PPE on before opening any panel | Protects against splashes and sharp edges |
| Work on a flat, stable surface | Prevents tipping and jack slippage |
“A servicing task rushed without preparation is a task half done. Your checklist is not a formality. It is your first line of defense against errors.”
Pro Tip: Write your checklist the night before your service session, not the morning of. When you prepare it fresh, you remember things the on-the-day version misses.
With safety and tools arranged, readers are ready to move through the system step by step.
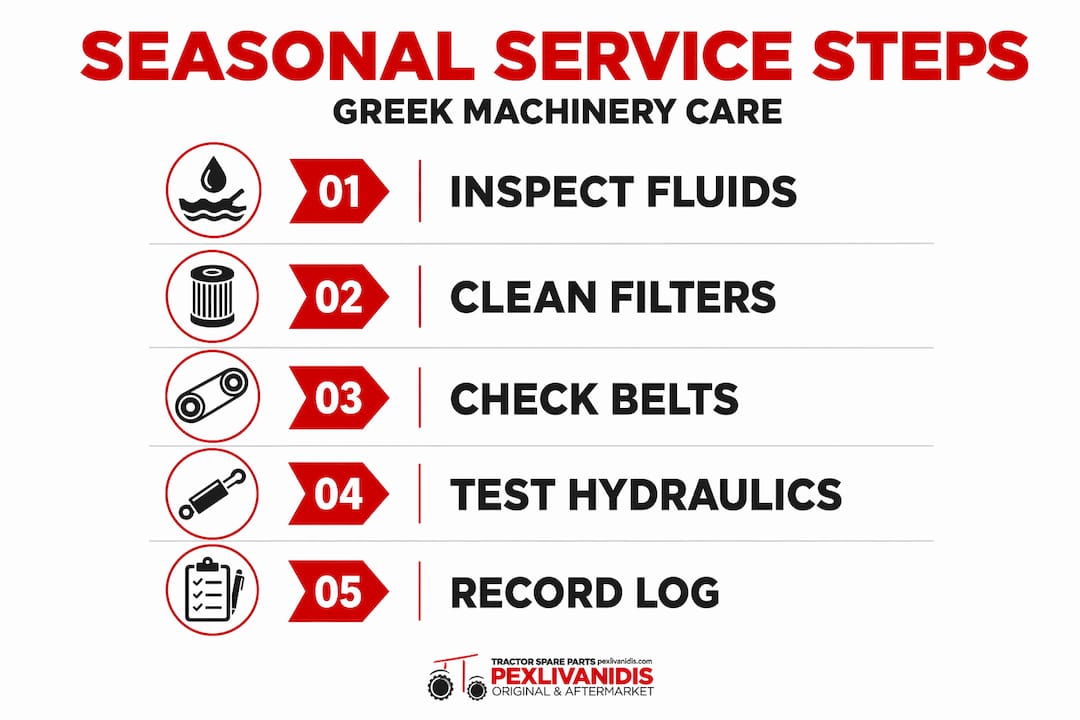
Daily and interval checks: The core workflow
Consistent daily checks are the backbone of any reliable servicing routine. Think of them like a pilot’s pre-flight walkthrough: brief, systematic, and non-negotiable. A practical step-by-step servicing workflow for tractor operators is best structured around daily pre-start checks, scheduled interval service at 50 to 100 hour milestones, and season-specific preparation.
Daily pre-start inspection steps:
- Walk around the entire tractor and look for visible leaks, damaged hoses, and loose fittings
- Check engine oil level with the dipstick and top up if needed
- Inspect coolant level in the reservoir, not just the radiator cap
- Check hydraulic fluid level and condition, looking for milky or dark color
- Inspect tire pressure on all four wheels and check for sidewall damage
- Verify lights, horn, and safety interlocks are working
- Clear any crop residue, mud, or debris from the engine bay and air intakes
Interval-based service milestones are where the real protection happens. Every tractor accumulates wear at a predictable rate based on hours of operation. Following these milestones is what the tractors maintenance procedure and routine checks guide are built around.
| Service interval | Key tasks |
|---|---|
| Daily (pre-start) | Fluid levels, tire pressure, leaks, walk-around |
| Every 50 hours | Grease all fittings, inspect loader pins, check battery terminals |
| Every 100 hours | Air filter inspection, belt tension check, hydraulic coupling check |
| Every 200 hours | Engine oil and filter change, fuel filter inspection |
| Every 500 hours | Transmission fluid check, cooling system flush, fuel system bleed |
| Every 1,000 hours | Full hydraulic fluid change, gearbox oil change, valve clearance check |
These intervals are not arbitrary. They reflect the rate at which lubricants break down, filters clog, and metal components wear under typical field loads. Sticking to them is the simplest form of preventive care, and it is well supported by maintenance tips for operators across all tractor brands.
Pro Tip: In Greek summer conditions, dust and heat accelerate filter clogging and oil degradation faster than the manufacturer’s base intervals assume. If you are working in dry, dusty terrain near Thessaloniki or Kavala, tighten your air filter and oil change intervals by 20 to 30 percent.
Seasonal servicing in Greece: Winter, spring, summer, fall
Greek farming is shaped by extreme seasonal contrasts. A tractor that handled summer grain harvest in central Macedonia faces very different stresses from one preparing for autumn olive picking in Chalkidiki. Your servicing plan must reflect those differences. A seasonal maintenance guide adapted to local conditions will always outperform a generic schedule.
Winter preparation (December to February):
- Test antifreeze concentration and replace coolant if protection drops below minus 15°C
- Fully charge the battery and clean terminals, cold weather accelerates discharge
- Check tire condition and store any removed wheels off direct concrete
- Apply rust protection spray to exposed metal and hydraulic cylinder rods
- Drain condensation from fuel tanks and add a fuel stabilizer if storing long-term
- Cover the tractor with a breathable cover if it will sit idle for weeks
Spring startup checks (March to April):
- Replace air filters and blow out dust from engine compartments
- Flush water filtration systems and check all seals for winter cracking
- Run a full fluid level check after the cold season
- Test all electrical systems, including PTO (power take-off) engagement
- Lubricate all grease points after winter storage
Summer high-heat checks (June to August):
- Monitor coolant temperature during extended work periods
- Check fan belts for cracking and glazing every 50 hours during peak use
- Clean radiator fins daily during dusty harvest operations
- Inspect hoses for swelling or soft spots caused by heat pressure
- Keep a spare fan belt in the tractor cab during harvest season
Autumn preparation (October to November):
- Thoroughly clean all hydraulic connections and protect from crop debris
- Re-grease all pivot points after heavy harvest season loads
- Inspect and clean fuel filters after summer use
- Check tire tread depth before wet season field work begins
As structured seasonal workflows demonstrate, season-specific preparation is as important as interval-based service for preventing major failures.
Pro Tip: If your farm spans multiple crop types, map your servicing schedule to your harvest calendar, not the calendar month. A cotton farmer in Serres needs a different summer service date than a winegrower in Naoussa.
Servicing hydraulic and transmission systems: Expert steps
Hydraulic and transmission systems are the most expensive subsystems on any tractor. They are also the most sensitive to contamination. Getting this service right requires patience, cleanliness, and a methodical approach. For these systems, strict cleanliness and careful filter and oil sequencing are non-negotiable, especially when shared reservoirs are involved.
Step-by-step hydraulic fluid and filter service:
- Warm the machine to normal operating temperature, this helps fluids drain fully
- Clean the area around drain plugs and filter housings before opening anything
- Drain old fluid into a labeled pan and inspect it, milky fluid means water intrusion, metallic particles mean internal wear
- Remove the old filter carefully, avoiding spilling contaminated fluid back into the system
- Inspect the suction screen (located inside the reservoir) for debris buildup
- Install the new OEM filter, pre-filling it with fresh fluid to reduce dry-start time
- Replace the drain plug with a new sealing washer and refill with the correct fluid grade
- Run the system through its full range of motion and check for leaks at all connections
Contamination warning: On many tractors, the hydraulic and transmission systems share a common reservoir. A single contamination event during service, such as dirty tools or an unsealed container, can spread through both systems simultaneously. Always treat shared-reservoir service as a high-risk procedure.
Additional hydraulic troubleshooting becomes necessary when you notice slow response, unusual noises, or visible leaks. In those cases, check the pump output pressure before replacing components.
Pro Tip: Always inspect suction screens during every hydraulic service. They rarely get replaced but collect debris that starves the pump, and a pump replacement costs far more than a screen cleaning.
Troubleshooting and preventing common mistakes
Even experienced operators repeat the same errors season after season. The good news is that most problems are preventable with awareness and structure. When diagnosing issues, systematic, component-based troubleshooting before parts replacement is the approach that saves money and time.
Common preventable mistakes:
- Skipping pre-start checks because the tractor “ran fine yesterday”
- Using non-OEM filters and seals that do not match exact tolerances
- Incomplete service logs that leave no record of what was done or when
- Over-tightening drain plugs and stripping threads in aluminum housings
- Mixing fluid types when topping up without checking the existing specification
- Ignoring small leaks that later become hydraulic or engine failures
- Servicing only when something breaks, rather than on a scheduled interval
The systematic repair steps needed when a problem appears are far more complex when records are missing. Your logbook tells you when the last filter change happened and whether the symptom is new or recurring. Without it, you are guessing.
Step-by-step diagnostic approach for any symptom:
- Describe the symptom precisely, what sound, smell, or behavior changed and when
- Check the simplest cause first, fluid level, loose connection, or blocked filter
- Verify whether the issue is intermittent or constant
- Consult your service log for any recent changes that might be related
- Test one system at a time, starting with the most accessible
Pro Tip: Never order replacement parts until you have confirmed the root cause. Operators who buy parts based on symptoms alone often replace components that were working fine, wasting money while the real problem remains.
A smarter way: Servicing as a system, not a chore
Here is something that most checklists will not tell you. The list itself is not what keeps a tractor running. It is the mindset behind it.
Farmers who treat servicing as a system do four things differently. They verify safety and machine condition before every task. They remove root causes early, particularly air filter blockages and contamination entry points. They use interval-based service to prevent wear rather than chase it. And they document outcomes so they can tune future schedules to what their specific fields actually demand. That approach is backed by interval-based servicing research showing that documentation-driven servicing consistently outperforms reactive repair strategies.
The contrast between reactive and proactive service is stark in real Greek farming conditions. A farmer near Kavala who tracks oil change intervals by hour meter and adjusts for summer dust loads will spend far less on repairs than a neighbor who changes oil “when it looks dark.” The reactive operator is not careless. He is just not treating service as a system.
From our experience working with operators across northern Greece, the farms that have the fewest emergency breakdowns are not always the ones with the newest tractors. They are the ones with the most consistent records. A five-year-old tractor with a complete logbook and quality part substitutions outperforms a newer machine that has been serviced only when convenient.
The hard truth is that checklists become outdated the moment field conditions change. A system adapts. Build your servicing around your own records, your own climate, and your own workload intensity.
Next steps: Reliable parts and smarter upgrades
Now that you have the full servicing workflow in hand, the next step is making sure you have access to quality components when your schedule demands them. Genuine parts are not a luxury. They are what makes the system you have built actually work. At pexlivanidis.com, you will find a catalog of over 20,000 agricultural machinery parts covering a wide range of tractor brands and models, with free shipping across Greece for orders over 100€. Whether you are restocking filters, sourcing hydraulic seals, or looking for upgrade tips to improve equipment performance, you will find both the parts and the guidance you need. Use the maintenance guide resources on the site to complement the workflow in this article and keep your equipment performing at its best through every season.
Frequently asked questions
How often should I service my tractor for Greek farming conditions?
You should perform daily pre-start checks every time you operate the tractor, schedule interval services at 50 to 100 hour milestones, and complete seasonal maintenance aligned with Greek climate demands, tightening intervals during hot, dusty summer operations.
What are the top mistakes to avoid during machinery servicing?
Skipping checklists, using non-OEM parts, and failing to log inspections are the three most damaging habits. A structured maintenance log and OEM-quality parts together reduce repeated downtime more than any single repair ever will.
How do I prevent hydraulic system contamination?
Keep your workspace clean before opening any hydraulic connection, change fluid and filters on schedule, and inspect for metallic particles during every drain. Strict cleanliness protocols are especially critical in shared hydraulic and transmission reservoir systems.
Why should I use OEM parts for machinery maintenance?
OEM parts are engineered to exact tolerances for your specific tractor model, meaning they fit correctly, seal properly, and last longer than generic alternatives. Using OEM-quality parts consistently is one of the strongest predictors of lower long-term maintenance costs.