
Unexpected tractor breakdowns drain your time and budget when you need your equipment most. Many Greek farmers face costly downtime during critical planting or harvest periods because of preventable mechanical failures. This practical maintenance checklist helps you catch problems early, extend your tractor’s lifespan, and keep operations running smoothly throughout the year. By following these simple steps, you’ll reduce repair costs and improve reliability when your farm depends on it.
Table of Contents
- Common Tractor Issues And Preparation For Maintenance
- Step-By-Step Tractor Maintenance Checklist
- Troubleshooting Common Tractor Problems
- Verifying Tractor Maintenance Effectiveness And Tips For Longevity
- Explore Expert Machinery Maintenance Resources On Pexlivanidis
- Frequently Asked Questions
Key takeaways
| Point | Details |
|---|---|
| Prevention saves money | Regular maintenance stops most breakdowns before they happen and cuts repair expenses |
| Battery care is critical | Weak batteries cause the majority of starting failures in agricultural equipment |
| Systematic checks work best | Following a structured checklist ensures you never miss important maintenance tasks |
| Early detection matters | Spotting wear signs early prevents minor issues from becoming expensive repairs |
Common tractor issues and preparation for maintenance
Your tractor faces harsh conditions that accelerate wear on critical components. Over 70% of tractor breakdowns are preventable, stemming from a handful of common tractor issues. Battery failure tops the list, especially during cold Greek winters when starting power drops. Cooling system problems rank second, causing overheating during summer fieldwork. Tire wear creates safety hazards and reduces fuel efficiency. Hydraulic leaks waste expensive fluid and compromise implement performance.
Before starting any maintenance work, gather the right tools and supplies. You’ll need a quality multimeter for electrical testing, tire pressure gauge, hydraulic fluid appropriate for your model, engine oil meeting manufacturer specifications, and basic hand tools. Keep clean rags, safety gloves, and eye protection within reach. A flashlight helps you inspect hard to reach areas under the hood and chassis.
Check your battery health first by measuring voltage with a multimeter. A fully charged battery should read 12.6 volts or higher when the engine is off. Clean corrosion from terminals using a wire brush and baking soda solution. Inspect the cooling system by examining hoses for cracks, checking coolant levels, and looking for rust or debris in the radiator. These preparatory steps take 15 minutes but reveal problems before they strand you in the field.
Safety comes first when working on heavy equipment. Always engage the parking brake, lower all implements to the ground, and disconnect the battery before performing repairs.
Pro Tip: Keep a dedicated maintenance logbook in your tractor cab. Record every check, repair, and parts replacement with dates and hour meter readings to track patterns and plan future service.
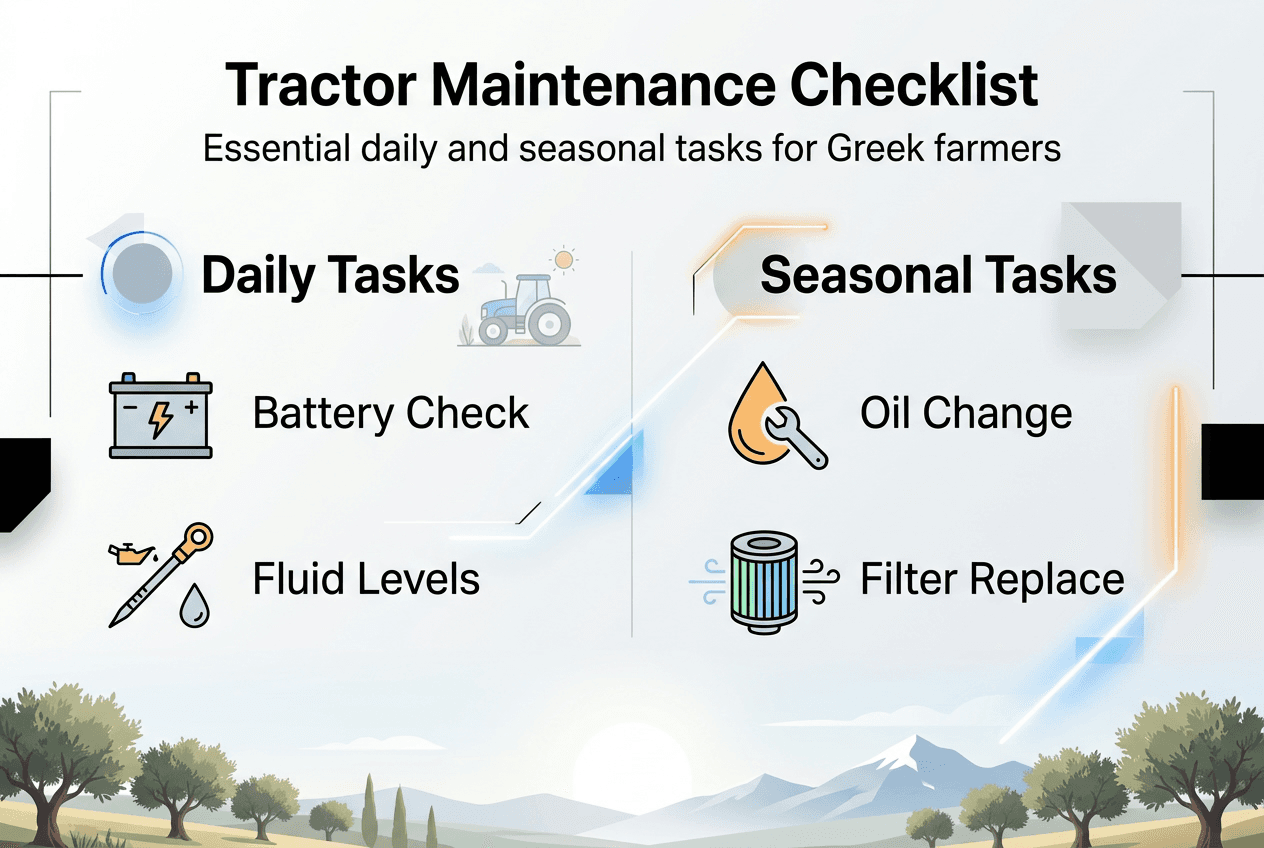
Step-by-step tractor maintenance checklist
Daily maintenance takes minimal time but delivers maximum protection. Start each workday by checking battery terminals for tightness and corrosion. Measure tire pressure when tires are cold, adjusting to manufacturer specifications printed on the sidewall or in your operator manual. Walk around your tractor inspecting for fluid leaks, loose bolts, or damaged hoses. Check engine oil, coolant, and hydraulic fluid levels before starting the engine.
Weak or dead batteries are a primary cause of engine starting failures. Test battery voltage weekly and clean terminals monthly to maintain reliable starting power. Inspect your hydraulic system for leaks around cylinders, hoses, and fittings. Top off hydraulic reservoir if needed, using only the fluid grade specified in your manual. Flush the cooling system twice yearly to remove sediment that reduces heat transfer efficiency.

Weekly tasks include lubricating grease fittings on steering components, loader arms, and three point hitch. Apply grease until you see fresh lubricant squeeze out, ensuring old contaminated grease is displaced. Check air filter condition by tapping it gently to remove loose dust. Replace filters showing damage or heavy dirt accumulation that restricts airflow.
| Maintenance Task | Frequency | Primary Purpose | Time Required |
|---|---|---|---|
| Battery voltage test | Daily | Prevent starting failures | 2 minutes |
| Tire pressure check | Daily | Ensure safety and fuel efficiency | 5 minutes |
| Fluid level inspection | Daily | Avoid engine damage | 3 minutes |
| Grease fitting lubrication | Weekly | Reduce wear on moving parts | 15 minutes |
| Hydraulic system check | Weekly | Prevent leaks and power loss | 10 minutes |
| Oil and filter change | Every 100 hours | Maintain engine performance | 45 minutes |
| Tire tread assessment | Monthly | Identify replacement needs | 10 minutes |
| Electrical system test | Seasonally | Ensure lights and gauges work | 20 minutes |
Seasonal maintenance prepares your tractor for demanding work periods. Change engine oil and filters before planting and harvest seasons when you’ll log the most hours. Inspect tire tread depth and look for cuts, bulges, or uneven wear patterns that signal alignment problems. Test all lights, gauges, and electrical accessories to catch wiring issues before they leave you working in darkness.
Follow the preventative tractor maintenance guide for detailed procedures on each task. These tractor maintenance tips help you work efficiently and avoid common mistakes that damage components.
Pro Tip: Schedule major maintenance during off-season months when you have more time and parts availability is better. Waiting until busy season creates delays when breakdowns occur.
Troubleshooting common tractor problems
Recognizing symptoms quickly minimizes downtime when problems develop despite regular maintenance. If your engine cranks slowly or won’t start, test battery voltage first. Readings below 12.4 volts indicate a weak battery needing recharge or replacement. Check cable connections for looseness or corrosion that increases resistance. Jump starting works temporarily but doesn’t fix underlying charging system problems.
Overheating shows up as rising temperature gauge readings or steam from the radiator. Stop work immediately to prevent engine damage. Common causes include low coolant levels, clogged radiator fins, or a failing water pump. Let the engine cool completely before removing the radiator cap to avoid burns. Inspect for leaks and clean debris from cooling fins using compressed air.
Prompt attention to hydraulic system issues can prevent significant operational interruptions and costly repairs. Hydraulic problems appear as slow implement movement, weak lift capacity, or visible fluid leaks. Check reservoir level first, then inspect hoses and fittings for damage. Contaminated fluid looks milky or contains metal particles, requiring complete system flushing and filter replacement.
Tire problems range from slow leaks to sudden blowouts. A tire losing pressure gradually often has a nail or small puncture you can repair. Bulges in the sidewall indicate internal damage requiring immediate replacement to prevent failure. Uneven wear patterns point to alignment issues or improper inflation that accelerates tire degradation.
- Engine won’t start: Test battery voltage, check fuel supply, inspect safety switch connections
- Loss of power: Replace air filter, check fuel quality, inspect exhaust for restrictions
- Unusual noises: Identify source immediately, check for loose parts or bearing wear
- Steering difficulty: Inspect power steering fluid level, look for hydraulic leaks
- Brake problems: Check fluid level, test brake pedal feel, inspect pads for wear
Never ignore warning lights or unusual sounds. Small problems become expensive repairs when you postpone investigation and continue operating damaged equipment.
Refer to common tractor repair methods for detailed troubleshooting procedures. Some repairs require professional service, but many issues you can diagnose and fix yourself with basic tools and knowledge.
Verifying tractor maintenance effectiveness and tips for longevity
Confirming your maintenance work was done correctly prevents repeat problems and builds your mechanical confidence. After servicing, start the engine and let it reach operating temperature while watching for leaks or unusual sounds. Test all functions including hydraulics, power takeoff, and electrical systems. Take a short test drive to verify steering, braking, and transmission performance.
Monitoring tire condition and inflation is essential for safety and operational efficiency. Walk around your tractor weekly looking for these warning signs versus normal conditions:
| Warning Sign | Normal Condition | Action Required |
|---|---|---|
| Battery terminals show white or green corrosion | Terminals are clean and connections are tight | Clean terminals and apply protective spray |
| Coolant appears rusty or contains floating debris | Coolant is bright colored and clear | Flush system and replace coolant |
| Hydraulic fluid looks milky or dark brown | Fluid is clear amber or red | Change fluid and inspect for water contamination |
| Tire tread depth is less than 40% of original | Tread depth exceeds 60% of original | Replace tires before loss of traction |
| Engine oil appears black and gritty | Oil is amber colored and smooth | Change oil and filter immediately |
| Air filter shows tears or heavy dirt buildup | Filter is intact with light dust only | Replace filter to restore airflow |
Maximize your tractor’s lifespan by addressing small issues immediately rather than waiting for complete failure. A $15 hose replacement today prevents a $500 overheating repair next month. Store your tractor under cover when possible to reduce weather exposure that accelerates rust and deterioration. Use fuel stabilizer if equipment will sit idle for more than 30 days.
Document every maintenance task with dates and hour meter readings. This history helps you spot patterns like recurring problems that need permanent solutions. It also proves regular maintenance when selling equipment or filing warranty claims. Follow key tractor maintenance tasks to build a comprehensive service routine.
Pro Tip: Buy quality replacement parts that meet or exceed original equipment specifications. Cheap aftermarket parts often fail prematurely, costing more in repeated repairs and downtime than the initial savings.
Explore expert machinery maintenance resources on Pexlivanidis
Pexlivanidis provides specialized guidance and quality parts to support your tractor maintenance success. Our agricultural machinery maintenance guide offers detailed procedures for complex service tasks beyond basic checks. You’ll find expert advice on timing belt replacement, fuel system cleaning, and transmission service that keeps equipment running efficiently.
Understanding types of agricultural machinery parts helps you select the right components for your specific tractor model and application. We stock over 20,000 items including batteries, filters, hydraulic hoses, and electrical components from trusted manufacturers. Free shipping within Greece on orders exceeding 100€ makes it economical to stock essential maintenance supplies.
Our agricultural machinery maintenance tips cover seasonal preparation, storage best practices, and troubleshooting strategies developed through decades of serving Greek farmers. Contact our team in Thessaloniki or Kavala for personalized recommendations on parts and service intervals for your equipment.
Frequently asked questions
What are the most common causes of tractor breakdowns?
Battery failure, cooling system problems, and hydraulic leaks cause the majority of tractor breakdowns in Greek farming operations. These issues develop gradually through normal wear but become critical failures when maintenance is delayed. Regular inspection and timely replacement of worn components prevent most unexpected downtime.
How often should I perform tractor maintenance?
Perform basic checks daily before starting work, including fluid levels, tire pressure, and visual inspection for leaks. Complete lubrication and filter service weekly during heavy use periods. Change oil and filters every 100 operating hours or as specified in your operator manual for optimal engine protection.
How do I know when my tractor battery needs replacement?
Replace your battery when voltage drops below 12.4 volts after a full overnight charge, or if the engine cranks slowly despite clean connections. Most tractor batteries last three to five years depending on climate and usage. Cold weather accelerates battery degradation, so test more frequently during winter months.
What are the signs my tractor needs immediate professional service?
Seek professional help immediately if you notice metal shavings in oil, sudden loss of hydraulic pressure, grinding noises from the transmission, or smoke from the exhaust. These symptoms indicate serious internal damage requiring specialized diagnostic equipment and repair expertise beyond routine maintenance capabilities.
Can I use automotive parts on my tractor?
Never substitute automotive parts for agricultural equipment unless specifically approved by the manufacturer. Tractors operate under different loads, temperatures, and duty cycles than cars or trucks. Using incorrect parts voids warranties and often leads to premature failure or safety hazards during operation.